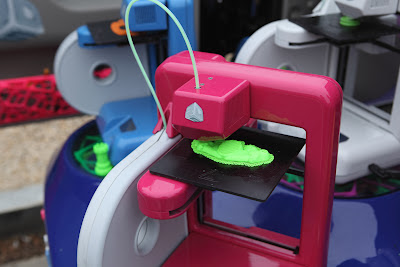
And, the performance and precision of a 3D printer is no exception. So, for the first time, I was able to examine the prints from the cube under 10x to 40x and analyze the characteristics of printed surfaces.
My favorite test shape is an extruded triangle. It has straight lines, flat surfaces and sharp edges. It's perfect for analysis. Most of you know that I already had a RepRap printer before purchasing the Cube. And, I put its output under the same microscope a while back. That's how I found out that that one of the rods that controls the up and down motion of the print bed on my RapMan was slightly bent.
Here's what it looked like at various powers from 10x to probably 40x. This is an edge of a triangle. Notice the regular pattern of hills and valleys.
Here is probably about 10x...
 |
| RepRap - Triangle Edge at about 10x |
This is probably at about 20x...
 |
| RepRap - Triangle Edge at about 20x |
This is most likely around 40x...
 |
| RepRap - Triangle Edge at about 40x |
Now, in reality, to the naked eye, it is not as ragged as it appears under the microscope. Remember, the layers are .25mm and that is VERY small. You can feel it rather than see it. And, I know that some RepRaps might not show this particular issue. But, it is so common that it has a name. It's called Z-Axis wobble.
So, now let's put the Cube print under the scope.
First, the same kind of triangle edge with the grain going the same way...
 |
| Cube - Vertical Triangle, Edge at 10x |
Look at that smoothness! That's remarkably flat. So, what about other grain orientations in an extruded triangle? The is the edge of a triangle with the grain in a slightly different orientation. The first triangle was vertical and this one was lying on its side.
 |
| Cube - Horizontal Triangle, Edge at 10x |
But, the really cool view is at the apex of the edge looking down on the extrusion.
 |
| Cubify - Vertical Triangle, Apex of Edge - 10x |
What about analyzing other features? Like a hole without support...
 |
| Cube - Hole in Wall, No Support - 10x |
The bottom of the hole is on the left in the above picture. So, now let's look at the same hole. But, this time printed with support.
 |
| Cube - Hole in Wall with Support - 10x |
This is very thin support. But, I haven't tried to remove it. So, I don't know how clean the hole ends up after the support is removed.
But, all of you know by now that I love the behaviour of Pentagon shaped holes. They NEVER seem to need support! And, look how clean they are at every apex!
 |
| Cube - Pentagonal Hole, No Support - 10x |
 |
| Cube - Pentagonal Hole, No Support - 10x |
And, let's begin to wrap it up with some up close and personal shots of the smoothness of the edge of a sphere.
 |
| Cube - Circumference of a Sphere - 10x |
Look how smoothly that sphere's arc is. That's beautiful.
And we will end our wrap up with a look at the edge of a thin-walled vertical column.
 |
| Cube - Wall of extruded Column - 10x |
I don't know about you. But, I think these images clearly demonstrate the capabilities of Cube to deliver precision prints This is EXTREMELY important if the things you design require tight tolerances. I plan several microscope to camera interfaces and it is amazing how precisely the center of the camera's lens must be aligned with the center of the microscope's lens. There is no margin for inaccuracy. I'm convinced that the Cube will finally allow me to achieve this goal consistently due to the straightness of the walls it prints.
I hope this is helpful and not confusing. I really do this for myself because it allows me to work WITH what I have. And, as it turns out, I have a lot with the Cube. :)
But, there is a reason why I share it with you. I want YOU to know that my enthusiasm for this little printer is based on cold hard facts and not just emotions. People can be enthusiastic on no basis at all. Admittedly, the initial enthusiasm that gave rise to the name of this blog was a gut level response based on years of dreaming what my perfect consumer 3D printer should be. But, then it was deepened by my driving from the DC area to Rock Hill, SC to see one for myself. I didn't have my microscope. But, I could see that the objected printed out right in front of me was remarkably smooth and precise. But, now I have the objective tools to validate or negate my gut feelings and, as you can see, my instincts seem right on target.
Let's compare the green Cube output with the white RepRap output one more time...
 |
| RepRap (White) vs. Cube (Green) |
The scope doesn't lie. A picture really is worth a thousand words.


